
If you’re reading this post chances are good you’ve been searching the internet for instructions on how to do something in the new 3D fashion software you’ve recently started using. When I first started using 3D design software I thought I could use just one tool to accomplish everything I needed to do. I only use one piece of software for all my patterns and grading, after all. But there came a day that I wanted to do something particular. The button shapes that were available were pretty pedestrian and I was trying to match one that we use frequently, and found that I couldn’t get the results I wanted out of the 3D software I was using so I went searching.
And rapidly hit a big wall.

You would think, with the huge amounts of resources available online teaching the various facets of Computer Generated Imagery used in the gaming, film, and animation industries, that it would be relatively easy to jump in and expand your 3D skills. You will quickly find that in that world, few people think of using only one piece of software to do everything, that it is routine to export and import your materials between two, three or more apps that do different things. So why is it so hard for us in the fashion industry to do the same? Why could I not just find a way to create my button easily? Why was it all so hard to understand? Sure there are button tutorials out there but why did they not work out for me when I tried to bring them back into my design software?
Primarily, it comes down to workflow, and the fact that most of our 3D software vendors haven’t thought much about it.
Throughout this blog I will refer to two different workflows; when I am speaking of fashion design in products like Clo, Browzwear, etc., I will refer to it as 3D. When I refer to the rest of it, like Blender and Substance, I will refer to it as CG, just to differentiate the workflows.
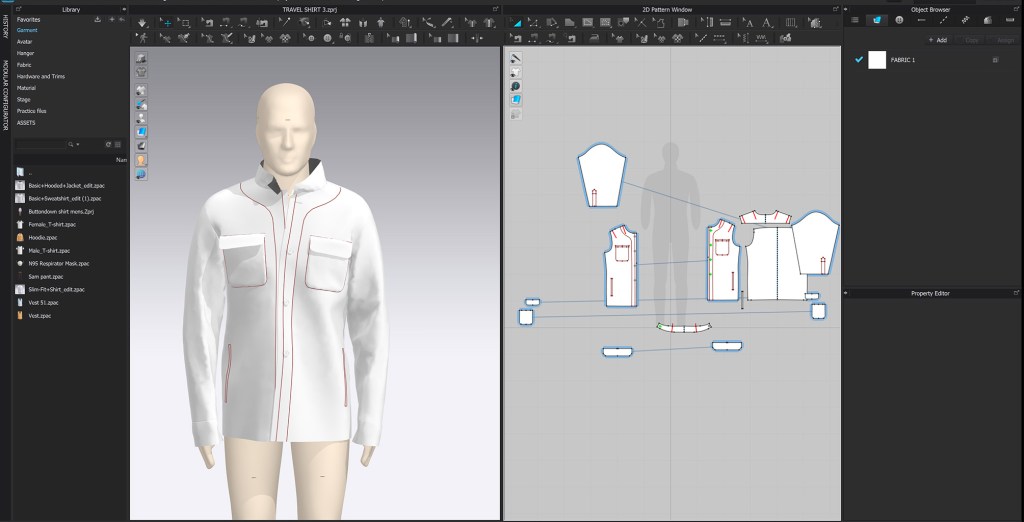
In 3D, we start with a 2D pattern which we tell the computer how to sew together, then we tell it where to drape it over an avatar, then we simulate, which is really creating a real-time animation using physics, and we cross our fingers and hope for the best. Then we see what we don’t like and we adjust. Lather, rinse, repeat. Then once we are getting closer, if we haven’t already, we apply some fabric and trims, and then we might change the mesh size to simulate for a final time, then render our image out.
In CG, the workflow is the complete opposite and in more distinct steps. The first is modeling, then texturing, then rendering. You may have some rigging and animation if you are being fancy. You either start with a very simple mesh object like a cube or a sphere and start sculpting from there, or you import a scanned mesh to work on. Your object is static. Your sculpting is deliberate and you’re not pulling you fabric this way and that. The only physics that may become involved is when you are doing animation, but then the options are much greater than just the interaction of fabric and avatar. Once you have come close to completing your sculpt, you will define seams on your object. This is SO important and can be difficult if the concept is unfamiliar but for us in fashion it is second nature.
Modelers have to decide where on their sculpt they are going to split the object apart in order to lay the chunks flat in order to texture them, or paint on them. At this point they are creating their 2D pattern, that thing that we in fashion usually start our process with. These flat objects are referred to as UV maps or UDIMS, and are extremely important to the process, but you may have never heard of them. In the past, Clo mysteriously referred to the button UV maps without really explaining them. More excitingly, in version 6 they released a UV editor but again without a great explanation of what it is used for so unless you already know what to do with it, you probably won’t figure it out. I’m going to spend a lot of time talking about UV maps so I will make a post dedicated to it. Clo has an integrated UV workflow, but Browzwear does not, Gerber does not, and I don’t know about Optitex and others, and without it you can’t go on to what would be the next step in CG which would be texturing. I was really excited when Gerber announced that you could bring your 3D designs from Accumark into Adobe’s Substance Painter, which is a phenomenal tool for really bringing life and detail to your designs, but then horribly disappointed to find out that you can’t actually do it unless you first bring your file into Maya, another (expensive) piece of 3D software, to create your UV maps. They neglected to mention that part. I tried importing Browzwear files just to see if it would work and it doesn’t.

Once the CG modeler has finished the sculpt, they might bring it into another app like Substance Painter to do the texturing. The vocabulary in texturing can be very confusing, especially to fashion people. A “texture”, for example, might lead to you think that this has something to do with the smoothness or bumpiness of the surface. In fact, it does not. A texture in Clo is just an image, or a color, and has no surface texture information. That information might come from a roughness map or a normal map. Which, if you skipped high school physics, you might have no idea what makes it so normal. Better yet, a displacement map. You might need an opacity map and a metalness map. These maps can be crucial to building a believable garment but can be confusing to noobs like me. There is plenty on information on web about making maps for building robots, but not so much for making garments and trims, so I will attempt to explain what I have learned so far as it applies to making clothes, in the hopes of saving you some of the frustration I felt.

This was a fascinating read. Informative, clear, and some fun to boot. Someone from my network asked me a question about your original post. (Let’s touch base) in the meantime….thank you and I’ll come back often. The way of explaining the workflows was great.